Introduction
As LCPtracker continues to update and make design changes to the software, we want to ensure that we provide training documents that our users can access to clearly walk-through new design features with no issues.
LCPtracker has made updates to our Contractor Assignment page and all new databases will now see the new view. For previous users we want to provide information on the changes you may see once the new functionality has been turned on. Currently, as of this publication date, this new contractor assignment tree view is not available to be turned on if utilizing the B2Gnow interface. Our Account Management team is working individually with older databases to switch our users over to the new view.
Steps with Using the New Contractor Assignment Tree View
How to use the new Contractor Assignment Tree View.
Note: if your account does not show this new version of the Contractor Assignment page, you can find the instructions for how to use the original process here. Turning on the new contractor assignment page must be requested by the database Admin. Please contact LCPtracker to request more information on this process.
- Login to www.LCPtracker.net
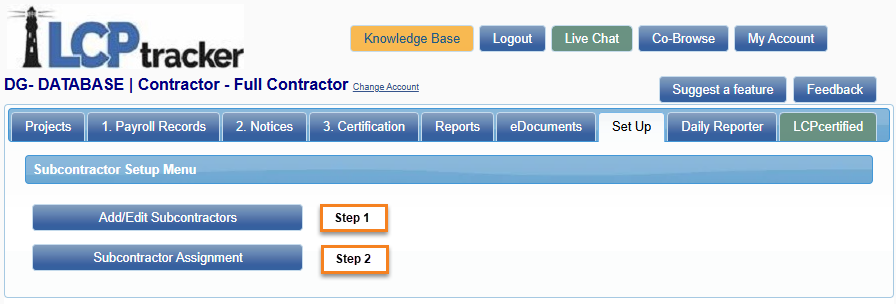
- Select the Set Up tab
- Click Subcontractor Setup
- First make sure that you perform step one of the Contractor Assignment processes as the Contractor must first be set up before moving to the Contractor Assignment step. Reference the Contractor User Guide for more information if needed.
- Select Subcontractor Assignment
A Prime Contractor will already be entered by the Admin. If an Admin has set their account to allow contractors to set up their own subcontractors, then the functionality will be available to perform the step of assigning your subs to the project.
First, you will select the Project under the filters. DO NOT select the Contractor at this time.
Once the Project is selected, you will see the project listed as well as the Prime Contractor that has been entered. If you are the Prime, you will see either a green plus sign ‘+’ or the info icon ![]() . This allows you to add a subcontractor under you or view what was entered by the Admin for your assignment.
. This allows you to add a subcontractor under you or view what was entered by the Admin for your assignment.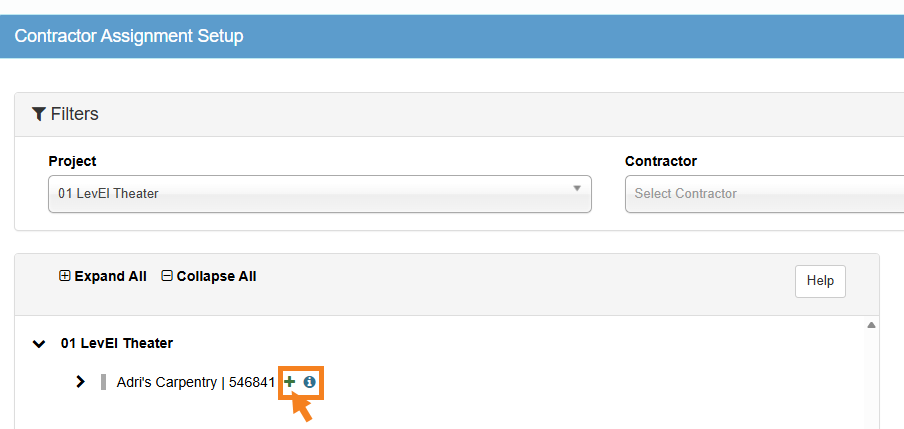
Select the green plus sign ‘+’ next to the name of the contractor that the lower tier subcontractor will be assigned under. This will generate the Assignment window to the right. In the assignment window, select the contractor/subcontractor to be assigned.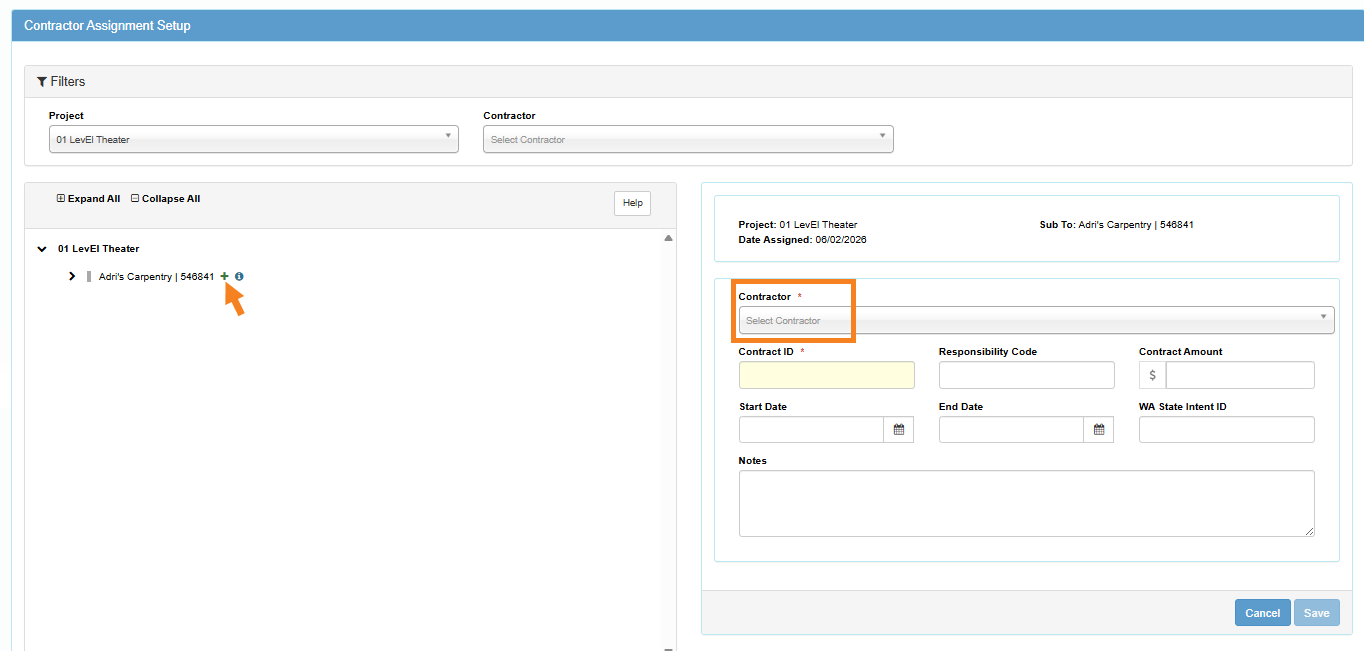
Before an assignment can be completed, the fields with the red asterisk ‘*’ will need to be completed.
Filling in the subcontractor assignment fields.
Select a project – You need to choose the Project that you are assigning your Subcontractor to.
Contractor (to be assigned) – Choose the Subcontractor you need to assign to the Project as your Subcontractor. This is usually the Subcontractor you just set up in the system. Some, however, are already in the system under this Admin’s account and you just need to assign them to the Project as your Subcontractor.
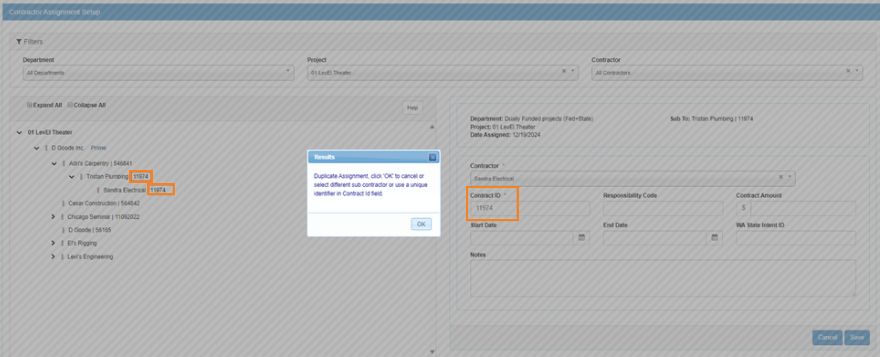
Contract ID – This is a required field. The Contract ID is the identifier for the contract between you and the subcontractor. You can use the same contract ID for each assignment as long as it is not a duplicate. If the same subcontractor is assigned to the project for multiple contracts, each assignment must have a unique Contract ID entered.
Example:
- ABC Company has contract ID# 123 as Prime.
- XYZ, LLC is sub to ABC and has contract ID# 123.
- ORG, Inc is sub to ABC and has contract ID# 123.
- ORG, Inc is sub to ABC (yes, again) this contract ID must be different than the one noted in first assignment.
Responsibility Code – Optional field, some agencies may request this information. Typically used with USACE.
Contract Amount – Optional field, some agencies may request this information. This is the amount of the contract between you and the subcontractor.
Start Date – Required by many agencies. This is the date that your subcontractor is to/or has started work on the project. This can be modified later if needed. This date drives the Late CPR Summary Report.
End Date – Optional field, some agencies may request this information.
Notes – Optional field, some agencies may request this information, or you may choose to add your own notes.
WA State Intent ID – Only projects within the state of Washington may see this field if turned on by the agency.
After you have made your choices from the drop down and entered any required information, be sure to Save. Once you’ve saved, your sub will be sent a second email informing them they’ve been assigned to a project.
You will now see a saved contractor assignment listed in the Contractor Assignment screen. You can see the assignment details by selecting the info ‘![]() ’ icon. To view the info icon, hover over the subcontractor’s name, once visible, select it to see the assignment details. The Date Assigned is a system-generated Date Stamp. This is the date that the Contractor was assigned to the project.
’ icon. To view the info icon, hover over the subcontractor’s name, once visible, select it to see the assignment details. The Date Assigned is a system-generated Date Stamp. This is the date that the Contractor was assigned to the project.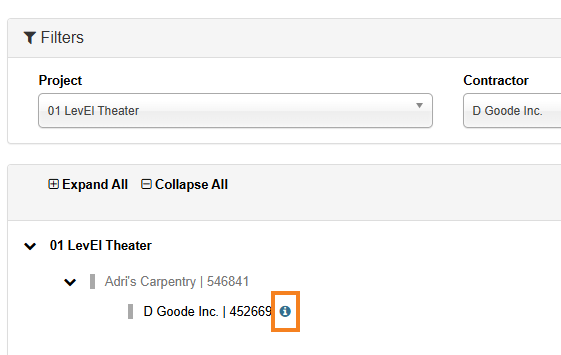
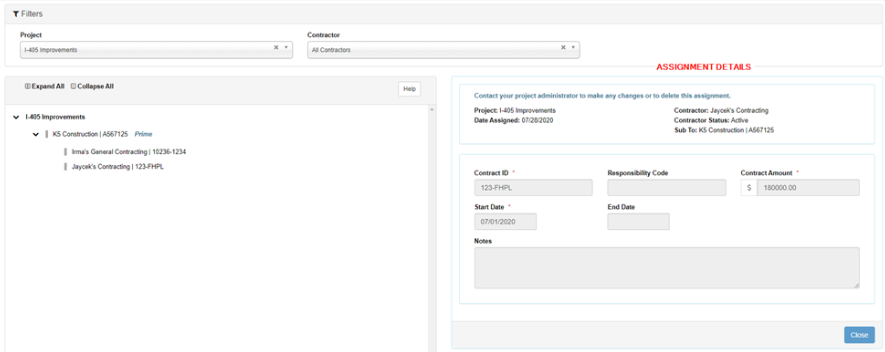
Note: once a lower tier subcontractor has been added, you are unable to make edits to that assignment. You will need to reach out to the database admin if edits or corrections need to be made.
The complete Contractor Tree View is only visible to the Prime Contractor or the Admin. Any lower tier assignments are only able to see assignments based on the tier level they are assigned to.
Original Subcontractor Assignment Process
Based on the database configuration by the Administrator, you may or may not have the ability to setup your Subcontractors. If the Subcontractor Set Up button is available, it is the responsibility of each Prime or Contractor to set up each Subcontractor they are using on the Project. If you are not allowed to setup your own Subcontractors, contact your Administrator, or go to Projects>Show Info and contact the person listed to have your Subcontractor(s) added and assigned to Project(s).
Subcontractors need to be entered into the LCPtracker database if they are working on the project. You will set up each lower tier Subcontractor that you have. Once you have set up your Subcontractor, they will then log into their account and set up any lower tier Subcontractors they have.
The Subcontractor setup is a two-step process:
Note: For purposes of this training document, we will only be covering step 2 of the original process for assigning subcontractors.
After you have clicked on the Subcontractor Assignment button, you will then need to click on Add New Assignment, on the top or the bottom of the page.
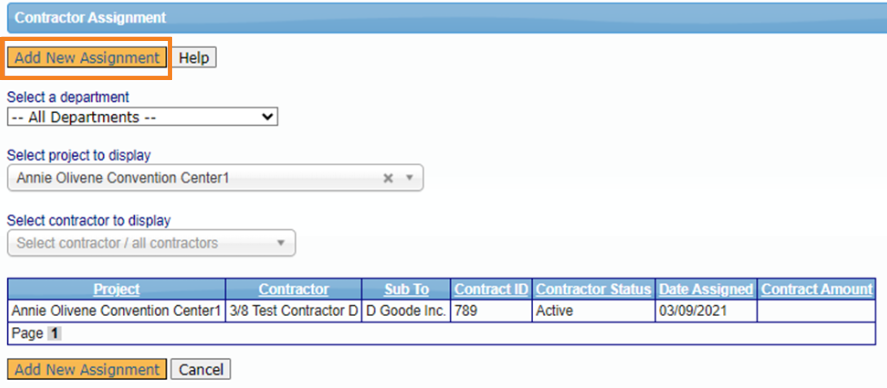
You will select the Project and the Contractor To Be Assigned. Any field marked with the red asterisk ‘*’ must have an entry before saving the assignment. Please refer to the image below for a description of the fields within this screen.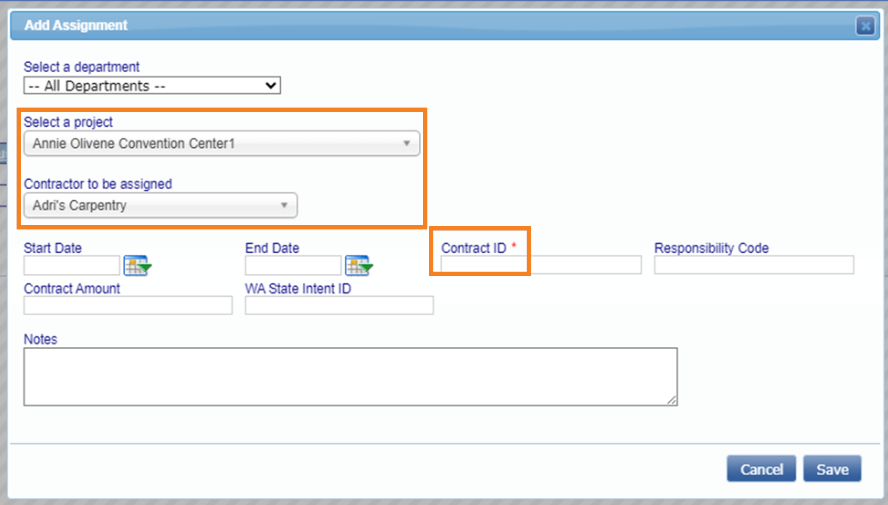
After you have made your choices from the drop-down menu and entered all required information, be sure to click Save. Once you have saved, your sub will be sent a second email informing them they have been assigned to a Project.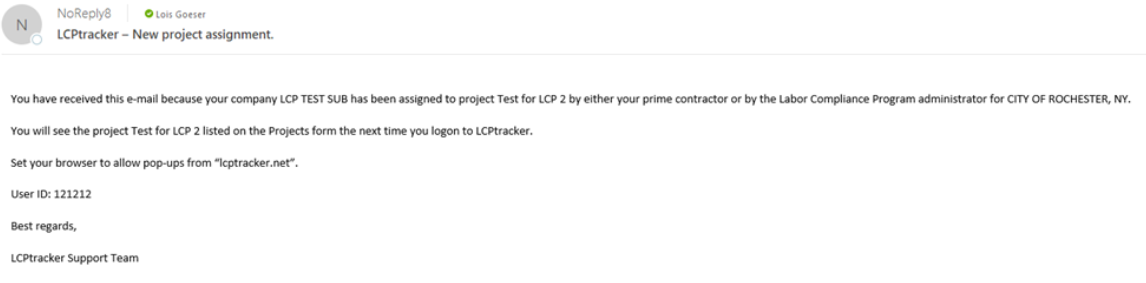
You will now see the saved Contractor Assignment listed in the Contractor Assignment screen. The Date Assigned is a system-generated date stamp. This is the date that the Contractor was assigned to the Project.
Support
LCPtracker has a fully staffed support team with a combined 166 years of customer service experience; going above and beyond to ensure your satisfaction is their core objective. We take pride in offering fanatical support through email, phone and live chat for Administrators and Contractors. All incoming support inquiries are tracked and logged with an advanced case management system.
The support team is available 5:00am PST – 5:30pm PST Monday - Friday (excluding Holidays).
To contact the Support team, please choose an option below:
- Email: support@lcptracker.com
- Phone: (714) 669-0052 Option 4
- Live Chat: Click the green Live Chat button at the top of your LCPtracker screen

- Co-Browse: This button can only be utilized when working directly with a support technician. This will allow support to share screens with you if needed.
Note: to assist our support technicians with getting back to you as quicky and efficiently as possible, please include your User ID, a direct call-back number, your contact information, and a brief description of the issue you are having.
Was this article helpful?
That’s Great!
Thank you for your feedback
Sorry! We couldn't be helpful
Thank you for your feedback
Feedback sent
We appreciate your effort and will try to fix the article