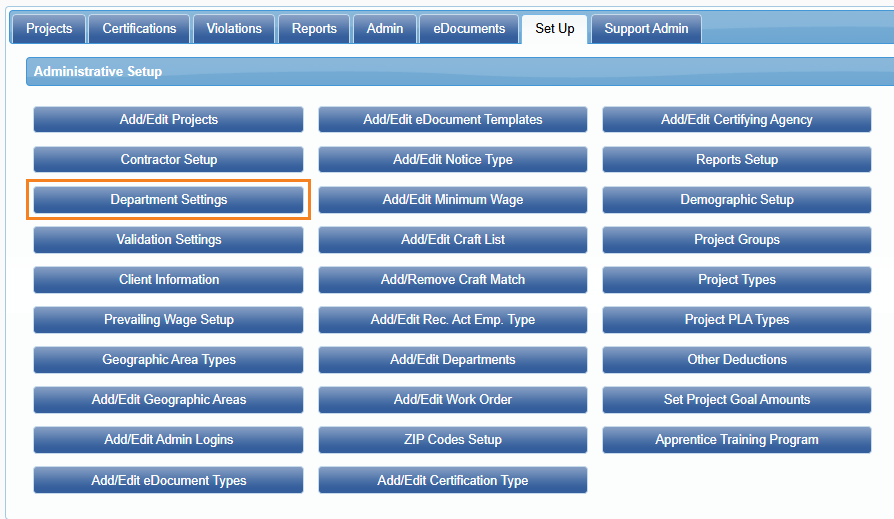
Department Settings
Using the Department feature is a way to group your projects. You could group by Organization Departments (example - Parks & Recreation; Public Works, etc.), Funding Sources (City, State, Federal, Private, etc.), Project Managers, etc. Each Department can set Validations and Department Settings differently.
Your Implementation Project Manager or Account Manager with LCPtracker would be able to explain this more during the original database configuration meeting when the account was originally set up. For those that are new or are creating a new department on your own, while some fields are self-explanatory, we will go through them here. It is highly suggested you do not make any changes without first consulting LCPtracker.
Add/Edit Departments
First, you create Department(s) under the Set Up navigation tab and click the Add/Edit Departments.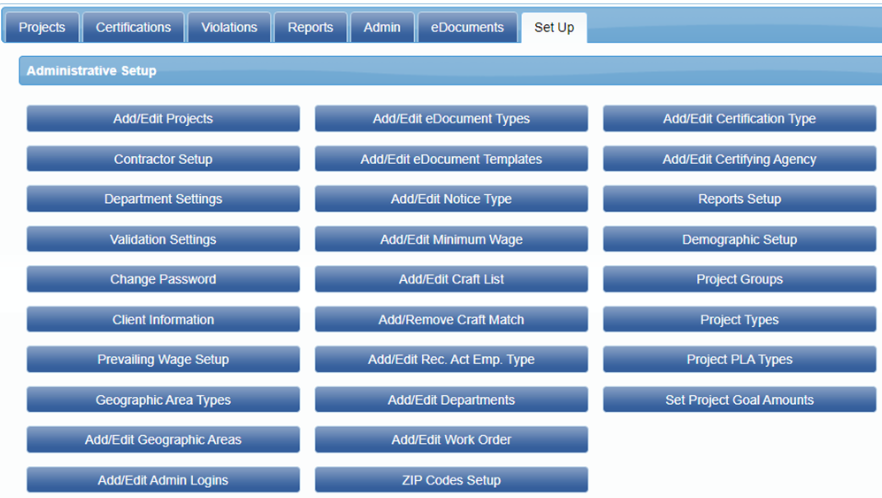
You will see the Default Department that is in the system. You should NEVER edit/delete the Default Department; you may use this as a department if you wish or create your own and use them, ignoring this default.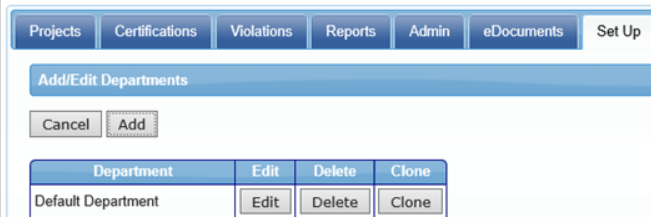
When creating Departments, the name (what you want to name your department), contact name and email address are required fields to save and create a department.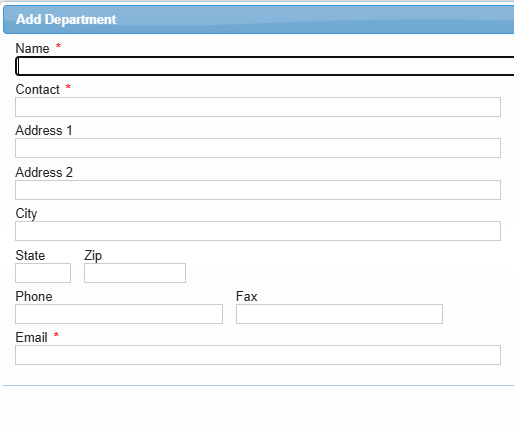
If you have already setup your default department or another department name for a previous type of project, it is recommended to use the “Clone” button to copy over the settings which will save you time with your setup.
Department Settings
Department settings can be set differently per department. These settings where carefully considered when you originally set up the database account. We will walk through the setup information, but it is our recommendation to first consult with LCPtracker before making any changes to your settings.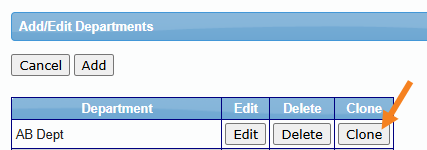
When first setting up a database, the following default settings will show. An LCPtracker Implementation Project Manager or Account Manager will go through a series of questions to determine the changes that will be made to your Department Settings based on your needs.
Note: the following screen shots are the default settings and should ALWAYS be updated for each individual department.

When accessing Department Settings, the default Department will show “Default Settings“. It is important to ALWAYS change this selection to an actual department name before making any changes even if you decide to only use “Default Department”.

The “Select the logo to upload” section is only visible to an LCPtracker Implementation Project Manager or Account Manager. If needed, this allows you to add a different logo that you want displayed on the certified payroll reports (CPRs). You may create a separate database for a joint venture and want to use the logo that is different than the logo uploaded to the database.
Following is an explanation for each of the items listed within the Top Section of the Department Settings.
If the box is Checked = Yes/On and un-checked = No/Off.
E-mail Certification Rejection Notices? – Do you want the system to send an email to subcontractors when you reject CPRs?
Enforce eDocument Requirements? – Under the Set Up navigation tab, you have the Add/Edit eDocument Types. The Types of documents you wish end users to upload into the system.
Send Primes E-Mail Notices? – If you want your Primes to receive system generated emails when rejecting a subcontractor’s CPRs.
Require eSignature on HUD Additional Data Entry Submittals – For HUD (Housing and Urban Development) projects / Departments. If you wish to require an eSignature from a subcontractor when submitting Additional Data Entry.
Require Start Dates on Contractor Assignments? – Adds a red asterisk (required field) to the contractor/subcontractor start date field when assigning them to a project. This field is used with the Late CPR Summary report to help identify late CPRs.
Require Responsibility Code on Contractor Assignments – Created and used by those specifically working on projects for USACE (United States Army Corps of Engineers). System will require the Responsibility Code when assigning subcontractors to projects.
Require Contract ID on Contractor Assignments – The Contract ID is the contract number between you and the subcontractor. This helps the contractor identify which contract to enter payrolls for when there are multiple contracts on the same project.
Require Contract Amount on Contractor Assignments – Ability to collect the contract amount for each contractor/subcontractor assigned to the project. Checking the box will make this a required entry.
Require Payroll Payment Date – If checked, contractors will be required to enter the payroll payment date for the CPR they are saving and certifying.
Do not allow CPR Export until Prime Approver accepts CPR – This feature is only available if the Prime Approver module is turned on. This is typically used only in California. Having this checked will require the Prime Approver to approve the CPR before the contractor can export the data for their upload requirement to the DIR (if applicable).
Do not allow CPR Export until Administrator accepts CPR – This feature is typically used in California. Having this checked will require the Admin/Agency to accept the CPR before the contractor can export the data for their upload requirement to the DIR (if applicable).
Prevailing Wage Lock-In (do not allow project wage data changes) – This setting is not shown in all databases. Only available if the Admin wants to turn on the functionality to lock wages after assigning them to the project. This will prevent anyone other than a full admin from making changes.
Do not allow CPR edit after status changed to ACCEPTED – Once a CPR has been certified and the Agency/Admin has changed the status to “Accepted”, the contractor no longer has the ability to make any changes. They will need to reach out to the Agency/Admin and request to have the CPR status changed to “Permit Edit” to allow changes.
Enable Subcontractor Certification Acknowledgement – This turns on an additional step for all lower tiered subcontractors (not required of prime contractors). They will be asked “Did your company employ Subcontractors on the project this week?” Yes or No. This information will then be available to the Agency/Admin using the Subcontractor Acknowledgement Report.
Disable the Payroll Calculate Fringes Feature for Contractors (When using this setting, LCP recommends using the “Default” Fringe Display Format for CPRs below) – This feature is not widely used. Please speak with an LCPtracker Implementation Project Manager or Account Manager before turning on. Typically, only used when not all fringe boxes are able to be counted towards meeting the total prevailing wage rate.
Use Issue Dates for Prevailing Wage Look Ups? – Will force the system to look at the most recent issue date PRIOR to the week-end date of the CPR. It is recommended to ALWAYS have this box checked to be turned on.
Use Expiration Dates in Prevailing Wage Look Up (Change only if recommended) – This may not show in your database as it is not turned on for all databases. If available, this looks at the expiration date for prevailing wages and does not allow a contractor to select Do you want the system to send an email to subcontractors when you reject CPRs?
Wage Rates Referred to in Local Data List (Change only if recommended. Changing without consulting with LCPtracker could disable your access to wage rates data) – Created specifically for accounts that have wages maintained at the master level typically by the LCPtracker wage team. DO NOT MAKE CHANGES TO THIS SETTING WITHOUT CONSULTING WITH YOUR LCPTRACKER IMPLEMENTATION PROJECT MANAGER OR ACCOUNT MANAGER FIRST.
The following are settings regarding standard hours for your funding type, the Statement of Compliance required, Owner Operator settings and the number of days you allow a contractor to make changes to their CPR.
Standard Hours Per Day – This is the hours an employee can work in a day before double-time kicks in. If you do not have this rule, then 24 = null. See Validation 12b
Performing CPR Form Type – This selection will only appear if a custom CPR form type has been added to your database.
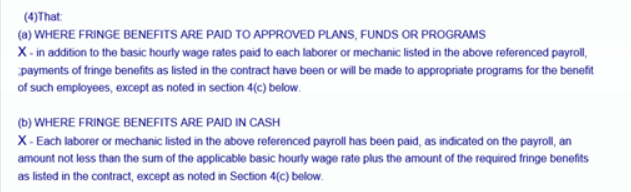
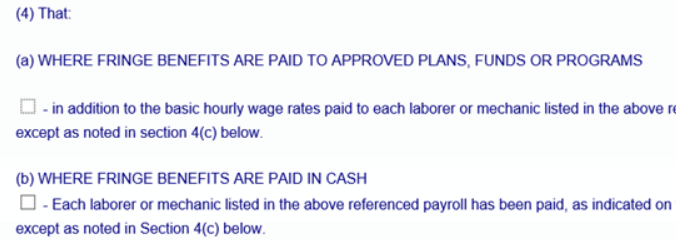
SOC Type – The standard Statement of Compliance (SOC) setting for this is “Fringe Payment Check Boxes” which is the standard WH347 SOC requiring that the contractor check either the 4a or 4b checkbox for how fringes were paid before the system will allow them to certify their payroll. Leaving this as Default will not allow the contractor to select. If your project requires a custom SOC, please contact your LCPtracker Implementation Project Manager or Account Manager.
Non-Perform SOC Type – The standard setting for this is “Fringe Payment Check Boxes” which is the standard WH347 SOC allowing the contractor to check either the 4a or 4b checkbox for how fringes were paid. For non-performing SOCs, the contractor can certify without checking one of the two checkboxes.
Does not allow for the contractor to select. Both boxes are automatically selected. 
Allows for the contractor to select.
CPR Edit Time – This is the amount of time you will allow the contractors to edit their CPRs if needed. If you are using the above feature, “Do not allow CPR edit after status changed to ACCEPTED”, the amount of time entered here may not apply once the Agency/Admin accepts the payroll. 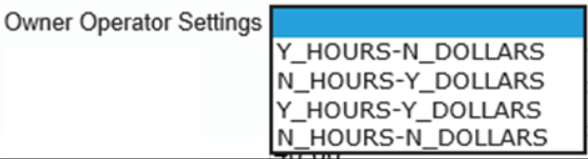
Owner Operator Settings – The Agency/Admin can set this to what they require to be collected for an owner operator trucking company. The options are:
Health Percent – This was specifically created for one Agency. While the default number states 20; this is only ON if validation 28 is turned on. Please contact LCPtracker if you want more information.
Emp Std Hrs – This is the hours an employee can work in a day before overtime kicks in. If you do not have this rule, then 24 = null. See Validation 11b
Emp Week Hrs – This is the hours an employee can work in a week before overtime kicks in. Default is set to 40.
The following information will go through the Bottom Section of the Department settings.
This will be the information that appears on the CPRs when your subcontractors view/print. While you may collect specific information regarding the employees on the project, you can choose to only show some of that information on the CPR when they view/print. For example, you may require the full SSN be collected but only choose to show the last 4 digits on the CPR.
If you do not have the system set to require the pertinent information, then it will only show if the subcontractor happens to enter it. It is our recommendation to configure your database to collect more information than not enough in the event that you need to report on specific information at a later time.

**see below will give you more information regarding this setting.
The above section will NOT set the requirement but only be where you select what you want to show on the CPR.
Show hours worked on all projects – If an Agency/Admin requires the contractor to show hours worked all projects, this will be a manual entry by the contractor for hours worked all projects.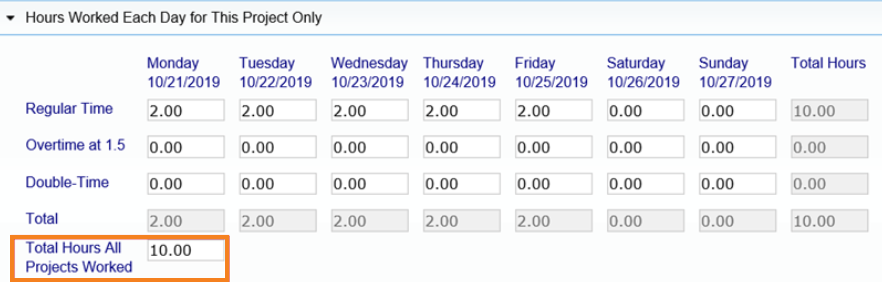
Show YTD accumulated sick pay hours – If the project is a Davis Bacon Act (DBA) project and has the requirement to adhere to Executive Order 13706, Paid Sick Leave, the Agency/Admin may turn on the following functionality. They would also need validation 66 turned on. This value would then show on the CPR as well as the Paid Sick Leave Accrual Report. 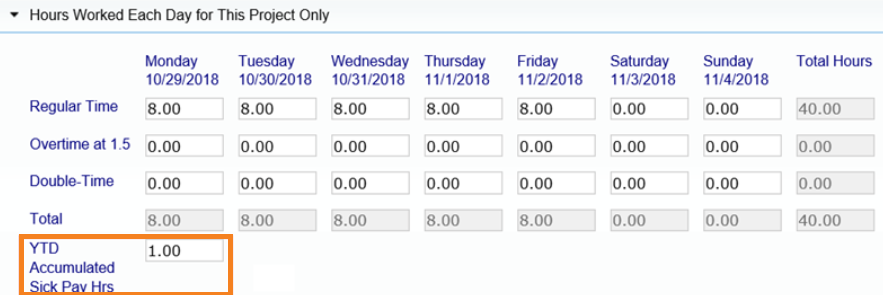
Show resident hours on CPR – If the Agency/Admin has one city they want to show city residence hours for, that city would get entered under Set Up >> Client Information >> enter the specified city. Once this feature is turned on, the CPR will show the hours for city and non-city residence based on the city entered for the employee address and the city entered within the client information page.
Note: this city cannot be changed by project. The city entered would be for the whole database.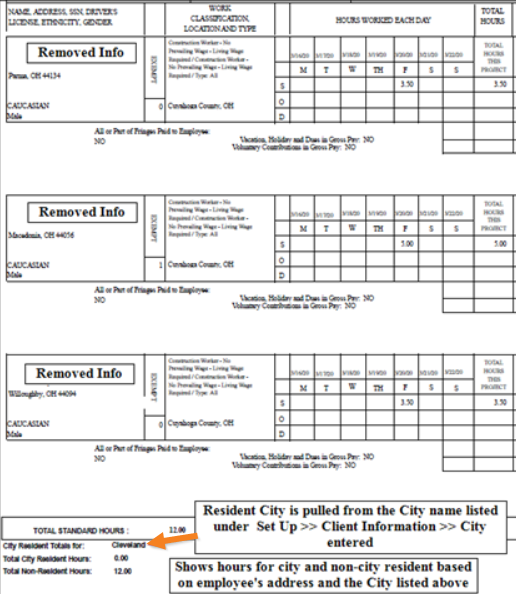
Fringe Benefit Display examples are as follows:
Default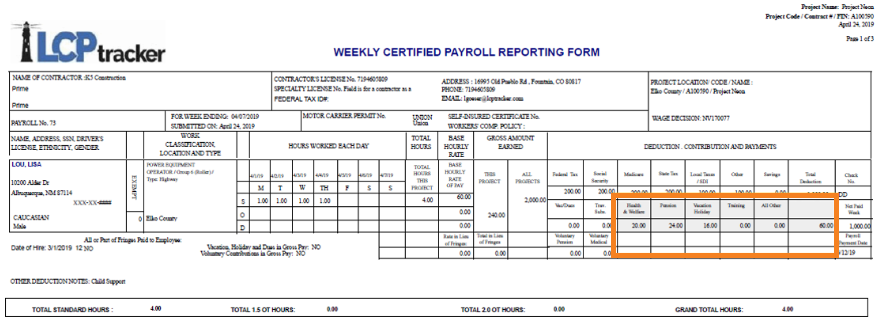
Minimal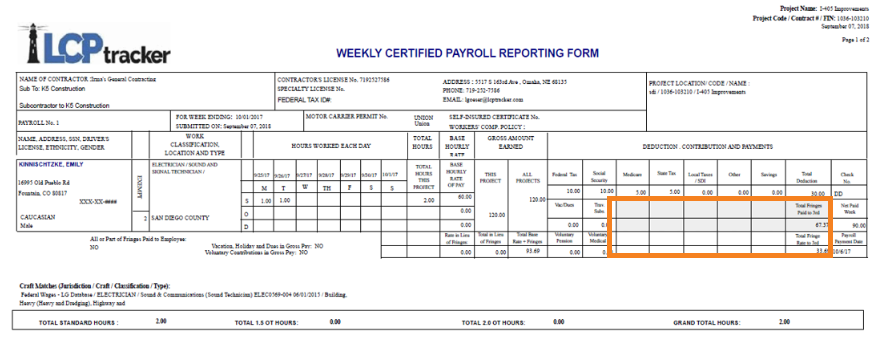
Extended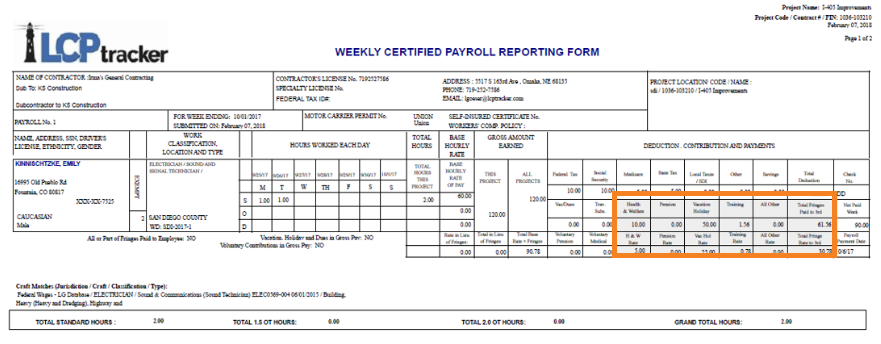
Was this article helpful?
That’s Great!
Thank you for your feedback
Sorry! We couldn't be helpful
Thank you for your feedback
Feedback sent
We appreciate your effort and will try to fix the article