Validation Settings
Validations are the mathematical and logical data checks that are performed on all the payroll data entered in LCPtracker system. Many checks are made on the payroll data when entered to ensure accurate data is captured correctly. The Validation Settings feature provides a way for the Administrator to control exactly what checks are made on payroll data, how this information is presented to the contractors, and how the Certification/Submittal process is controlled.
Only those administrators with FULL ADMIN rights can view or change Validation Settings. LCPtracker recommends giving very few people Full Admin rights.
This function is located under Set Up>Validation Settings. For any questions prior to making changes to your validations, please contact your LCPtracker Implementation Project Manager or Account Manager.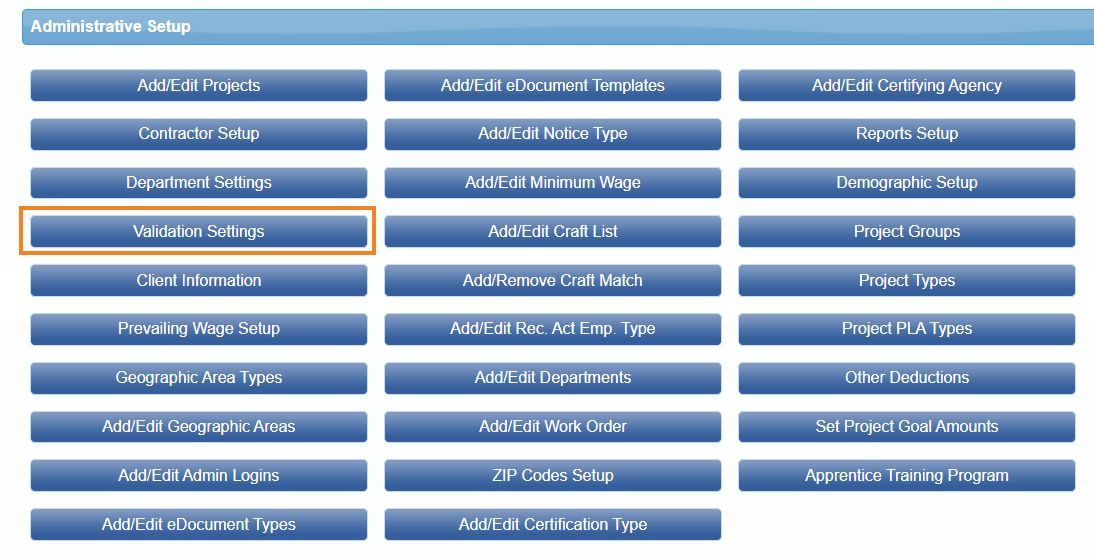
Validation settings may be set by Department and/or Jurisdiction. The Department feature is a way you can group by Organizational Department, Funding Source, Project Managers, etc. It is not mandatory to use Departments.
Limitations of Validation Checks in LCPtracker
In the following limited conditions, LCPtracker validation rules may not provide an accurate check of wages paid:
- When benefits are calculated as a percent of wages paid and overtime is worked;
- When benefits are calculated based on hours paid rather than hours worked, and overtime is worked;
- When overtime rate is not 1.5 times base rate of when double time rate is not 2.0 times base rate and overtime is worked.
Any other unusual or unique rules for calculating benefits and/or overtime may or may not be adequately checked by LCPtracker. If you have such unusual rules, please check with LCPtracker Staff to confirm LCPtracker’ s ability to check the rules.
Validation Controls
The Administrator can control four aspects of each validation. An explanation of how these controls work is presented below. Note: if a control setting is changed, then a payroll record that had an existing NOTICE or WARNING must be edited and saved so the new settings can be applied to the payroll record. 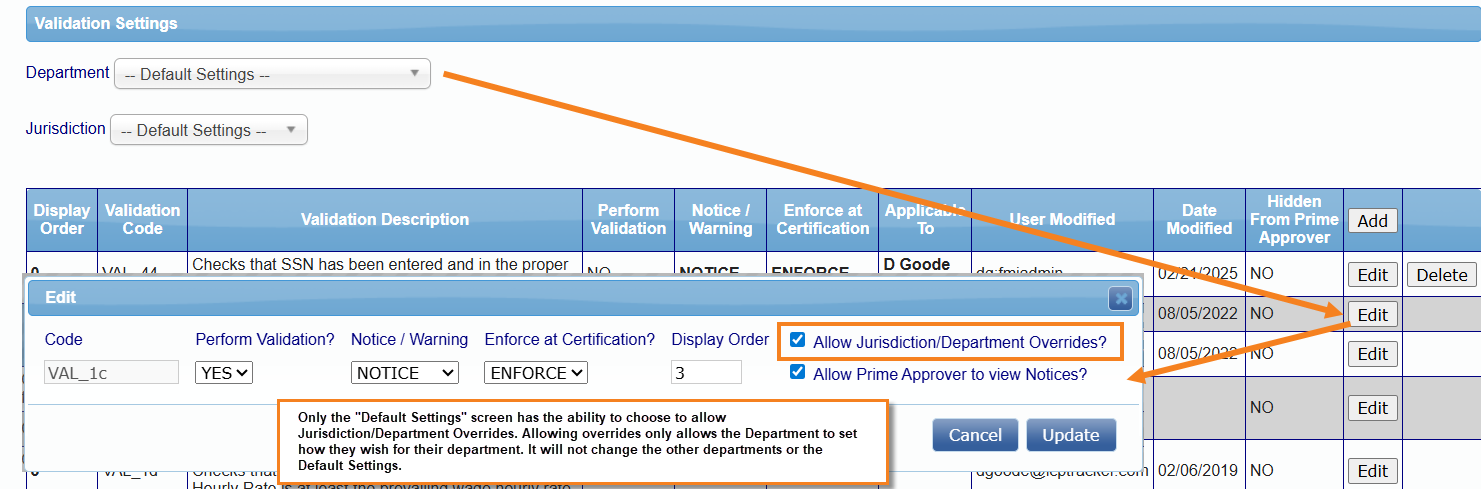
Perform Validation
YES/NO – controls if validation is done.
Notice / Warning
A NOTICE and ENFORCE indicates something is wrong based on the validation rules. Contractors will not be able to certify a report if this message occurs. An example of a NOTICE is when the Basic Hourly Rate paid is less than the pre-determined prevailing wage rate; which indicates a violation of prevailing wage.
A WARNING and ALERT indicates something may be wrong, but insufficient information is available to the program to determine further. However, contractors can certify the payroll under this setting. An example of a WARNING is when straight time is paid for Saturday work which, depending on the craft/classification, may or may not apply under this validation setting.
Note: Once the end users submit their CPR through system, Warnings will appear under the Administrators Violations Navigation Tab. For further information, see VIOLATIONS section of this manual.
Enforce / Alert / Hide / Discard
Enforce – Enforce will force notices to be cleared before certification.
Alert – Alert will only warn of the existence of notices when certifying and will be displayed to the admin user under the Violations Tab.
Hide – Hide will hide the warning or notice from the contractor and will not notify them when they enter/certify their payroll, but it will be displayed in administrator violations navigation tab; now the administrator is the first person to see the notice/warning generated.
Discard – Discard will only warn of the existence of notices/warnings when certifying and will NOT be displayed to the administrator under their Violations navigation tab. This option is very seldom used.
Most commonly used setting combinations - Yes /Notice/Enforce, Yes/Warning/Alert, or No
Validation Overrides/Exceptions
If you wish to allow a contractor, with special circumstances, to have a different setting on a certain validation check, you may create what is called a validation override.
To create overrides, click the ‘Add’ button in the top right. You will get a pop-up window to enter your information. Make the appropriate choices.
First, start with the validation code you want to make the exception for. You will then continue with what change you want to make to the current setting for your specific contractor. To perform the validation, select Yes and to turn off the validation completely, select No. The Notice or Warning selection is the type of enforcement to run at time of Certification. Next, the 'Applicable For?' is the contractor this override will be applicable to. Lastly, you can enter the display order to either show up top or move this to the bottom by selecting a high number. If you are using Departments, you will need to decide if you will Allow Jurisdiction/Departments to override.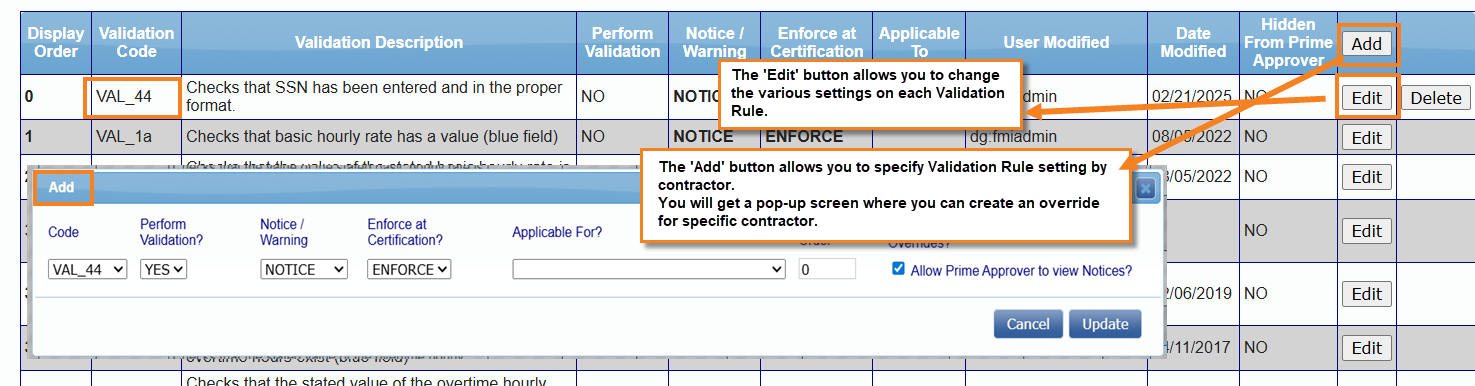
Allow Jurisdiction/Department Overrides
If you leave the box checked, it will allow departments to set the validations as needed for their department. Depending on funding there may be different rules and requirements as to what validations are on/off or set as Notices or Warnings.
Prime Approver Validation Settings
If you have chosen to use the Prime Approver module for your database, you will see an additional column in your validation settings. A Full Admin can hide validations from a Prime Approver by selecting yes on the desired validation. Please note this is not a commonly used feature. 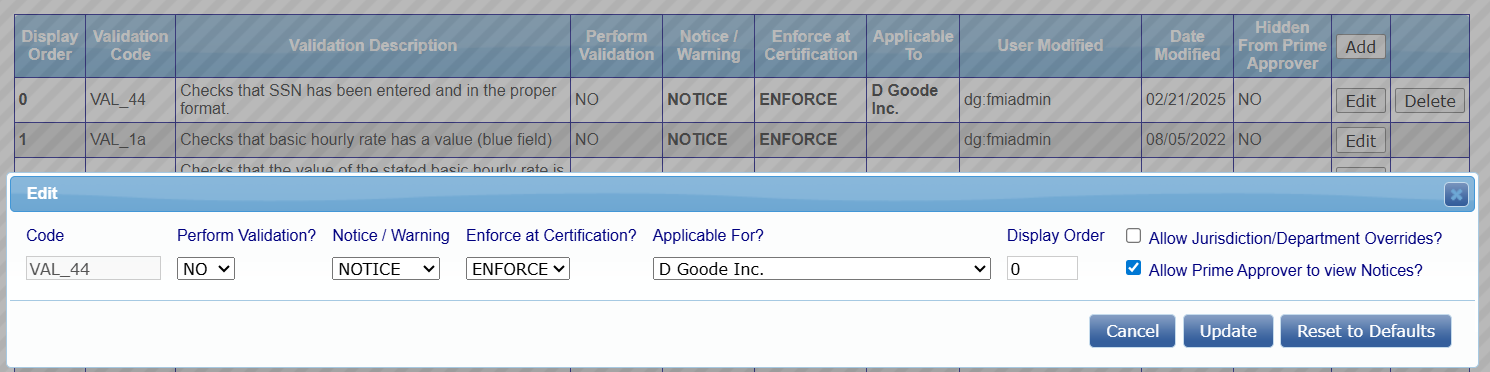
Validation Explanations
For a detailed explanation regarding each validation within LCPtracker, please reference the “Validation Settings” article under Training Materials>Administrator Support Documents>Validation Settings. 
Was this article helpful?
That’s Great!
Thank you for your feedback
Sorry! We couldn't be helpful
Thank you for your feedback
Feedback sent
We appreciate your effort and will try to fix the article